How to make:
A Original Series Star Fleet Belt
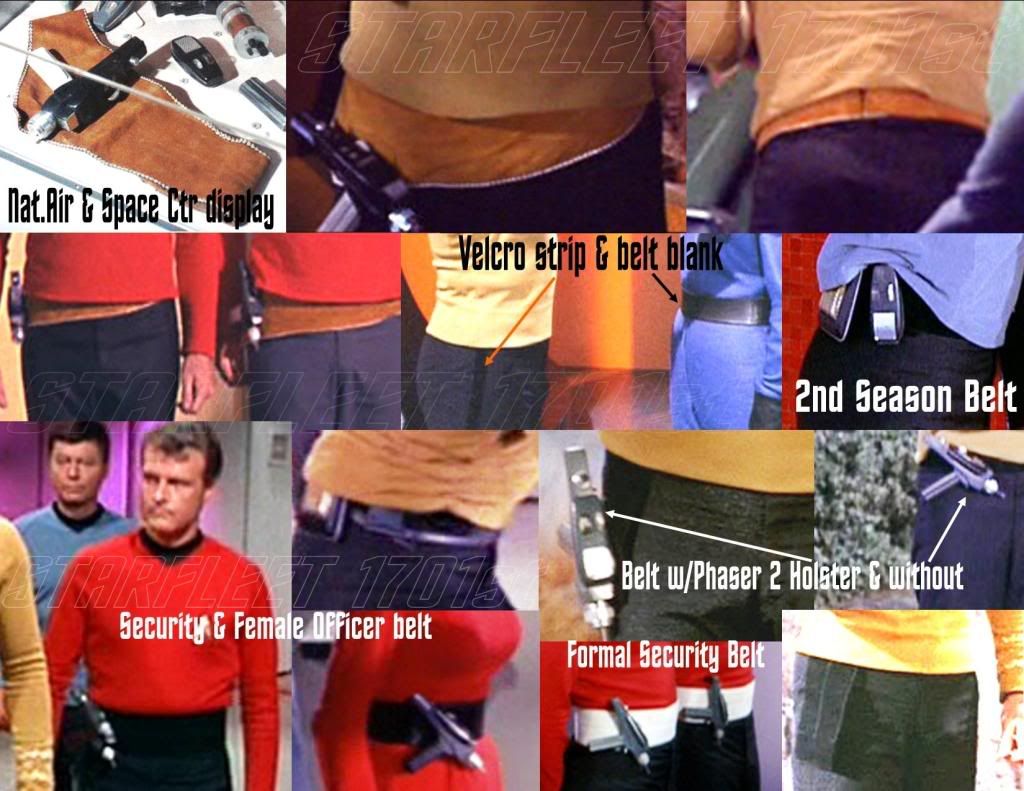
Alright, first thing is first. Over the time of the Original Series the belts varied and changed. The built I made was a simple black belt that was most commonly worn by the security officers and the women.
Belts are a necessity. I can't go walking around with my gun in one hand and my communicator in the other hand all the time. It is just too much.
What you will need:
- Black fabric
- Glue (I used Super Glue, but Fabric Glue works too, of course)
- Black Thread
- Needle

------------------------------------------------------------------------


------------------------------------------------------------------------


------------------------------------------------------------------------

5. Now that you have the base of the belt it is time to start making the compartments and whatnots to hold your do-hickies. The first is a pocket to hold the communicator. In the Original Series it looks like the used Velcro to hold things to the belt, but if you are out of Velcro or just worried about your props, then I would use the pocket.
First you want to get a piece of fabric slightly larger than your communicator.


Now it is the right length, glued down, sewed up, with a the perfect pocket for a communicator to call Scottie! You are almost done! Yay!
------------------------------------------------------------------------


It should look like this when it is done, I have the gun in there so you can get an idea of what it looks like!
------------------------------------------------------------------------


Now we can look all official with our belt holding our communicator and gun!
------------------------------------------------------------------------
I know this was my first official "How To", so if you liked it and you want to see more-- or if there is something out there that you just don't know how to make-- leave a comment!
------------------------------------------------------------------------
I know this was my first official "How To", so if you liked it and you want to see more-- or if there is something out there that you just don't know how to make-- leave a comment!
No comments:
Post a Comment